写在前面的话:失业待家里,看着城市里培训学校那些机器人玩具,我拿出我吃灰的树莓派3B打算部署一个seafile练练手,通过官网下载了最新的服务器端,但在安装时没成功,问题出来我用的centos系统是32位的,而最新的服务器端仅支持64位系统,这个问题还有待跟进解决。在家里计算机里找到一篇以前自己部署后写的文字,我按照之前自己写的文字再部署了一次,在这里分享。
RaspberryPi部署seafile
硬件:raspberry pi3 e14(电源、散热片、外壳)、TF卡16G、读卡器、个人电脑(Windows7)、交换机、网线若干
软件:SD Card Formatter(用于格式化TF卡)
Win32DiskImager(将操作系统镜像写入TF卡制作启动盘)
CentOS-Userland-7-armv7hl-Minimal-1708-RaspberryPi3(raspberrypi操作系统镜像)
seafile-server_6.2.5_stable_pi.tar.gz
Xshell
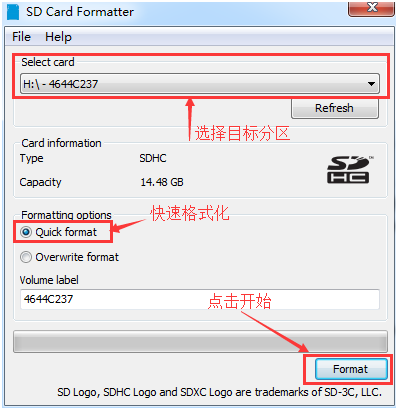
一、格式化TF卡
将TF卡放入读卡器,插入个人电脑使用SD Card Formatter进行格式化
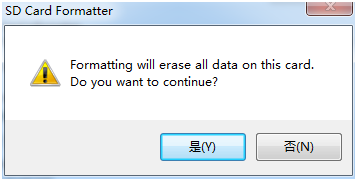
格式化将擦出此卡上所有数据,确实是否继续?点击是(Y)
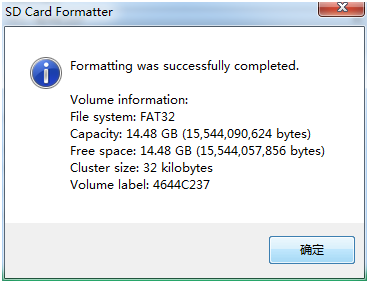
格式化完成
二、使用Win32DiskImager将CentOS系统装入TF卡

三、启动raspberry pi
将准备好的TF卡插入raspberry pi,连接好键盘、显示器、网线、电源,启动raspberry pi
四、配置网络
编辑ifcfg-eth0文件,将接口设为静态,并配置好IP地址、网关、子网掩码、DNS服务器地址等。

新建network文件
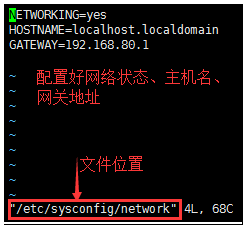
问题:在配置好eth0接口静态地址后一直不能上网,DHCP获得地址又能上。CentOS-Userland-7-armv7hl-Minimal-1708-RaspberryPi3(raspberrypi操作系统镜像)没有/etc/sysconfig/network文件。(这个问题在我这次部署时没有发生)
测试网络
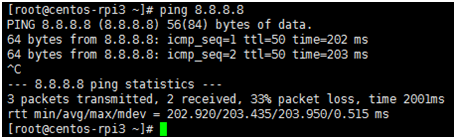
网络配置告一段落,现在可以通过远程连接了。
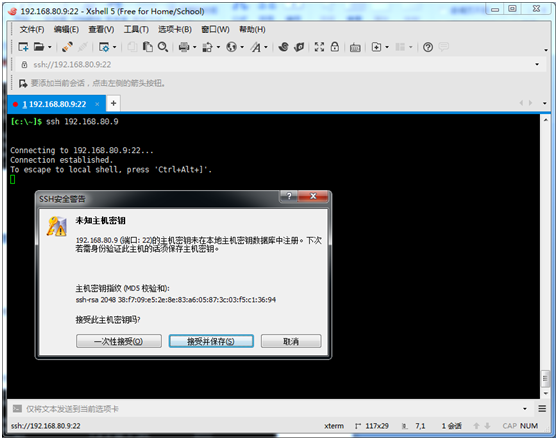
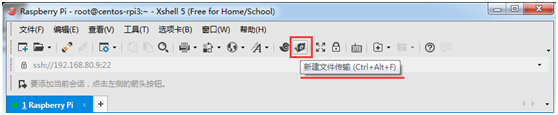
五、远程登录
Root账号:root
初始密码:centos
六、Seafile环境搭建
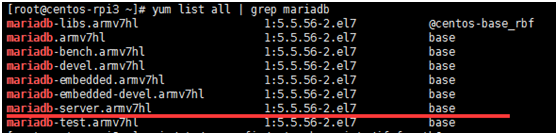
1、数据库Mariadb安装
[root@centos-rpi3 ~]# yum install mariadb-server.armv7hl
安装记录文件:
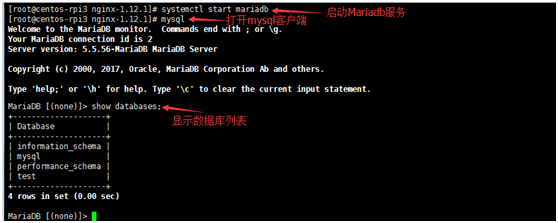
启动Mariadb测试连接
[root@centos-rpi3 seafile-server-6.2.5]# systemctl start mariadb
[root@centos-rpi3 seafile-server-6.2.5]# mysql
修改数据库root密码
MariaDB [(none)]> SET PASSWORD FOR ‘root’@‘localhost’ = PASSWORD(‘lqvsb!076920’);

2、下载安装Nginx
官方下载页面:nginx: download
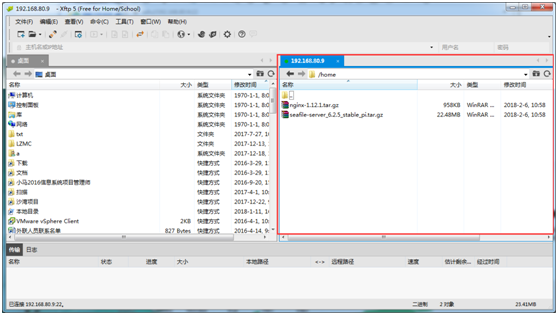
通过xftp上传到raspberry pi的/home目录下
随便把seafile的服务器端也传了上去
3、安装Nginx编译环境
安装gcc编译器
[root@centos-rpi3 nginx-1.12.1]# yum install gcc
![]()
安装记录文件:
4、安装PCRE库(the HTTP rewrite module requires the PCRE library)
[root@centos-rpi3 nginx-1.12.1]# yum install pcre-devel.armv7hl
![]()
安装记录文件:
5、安装zlib库
[root@centos-rpi3 nginx-1.12.1]# yum install zlib.armv7hl
![]()
安装记录文件:
6、安装make工具
[root@centos-rpi3 nginx-1.12.1]# yum install make
![]()
安装记录文件:
7、解压缩Nginx

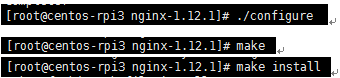
8、编译安装
[root@centos-rpi3 nginx-1.12.1]# ./configure
[root@centos-rpi3 nginx-1.12.1]# make
[root@centos-rpi3 nginx-1.12.1]# make install
安装记录文件:
安装完成部分文件和默认路径记录:
nginx path prefix: "/usr/local/nginx"
nginx binary file: "/usr/local/nginx/sbin/nginx"
nginx modules path: "/usr/local/nginx/modules"
nginx configuration prefix: "/usr/local/nginx/conf"
nginx configuration file: "/usr/local/nginx/conf/nginx.conf"
nginx pid file: "/usr/local/nginx/logs/nginx.pid"
nginx error log file: "/usr/local/nginx/logs/error.log"
nginx http access log file: "/usr/local/nginx/logs/access.log"
nginx http client request body temporary files: "client_body_temp"
nginx http proxy temporary files: "proxy_temp"
nginx http fastcgi temporary files: "fastcgi_temp"
nginx http uwsgi temporary files: "uwsgi_temp"
nginx http scgi temporary files: "scgi_temp"
问题:编译环境时遇见./configure找不到zlib库

如果确认zlib库已经安装没能解决,再将zlib_devel库也装上,这个问题是这次部署时遇见的

9、清除iptables规则
[root@centos-rpi3 nginx-1.12.1]# iptables –F
![]()
10、启动Nginx服务
[root@centos-rpi3 nginx-1.12.1]# /usr/local/nginx/sbin/nginx
![]()
11、测试Nginx已经启动
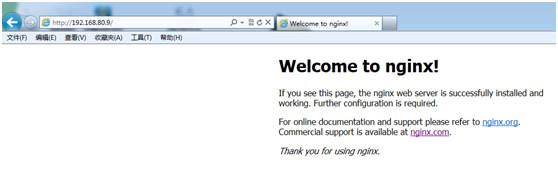
至此部署环境搭建完成。
七、部署seafile服务器端
官方Seafile服务器端、客户端下载页面:
https://www.seafile.com/download/
1.安装Python环境
[root@centos-rpi3 seafile-server-6.2.5]# yum install python.armv7hl python-setuptools.noarch python-ldap.armv7hl python-memcached.noarch python-urllib3.noarch python-imaging MySQL-python –y
![]()
PS:python-imaging模块在yum list all | grep python的列表里没有,但在执行yum install python-imaging后会安装python-pillow.armv7hl及其依赖关系的包。
安装记录文件
官方发布6.1.0以后版本必须要安装python-request模块
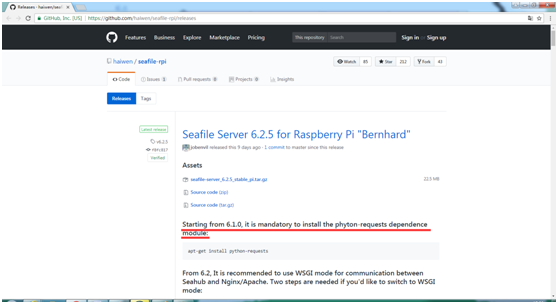
2.安装Python-request模块
[root@centos-rpi3 seafile-server-6.2.5]# yum install python-requests.noarch
![]()
安装记录文件:
3.解压seafile服务器端程序启动安装
[root@centos-rpi3 home]# tar -xf seafile-server_6.2.5_stable_pi.tar.gz
[root@centos-rpi3 home]# cd seafile-server-6.2.5/
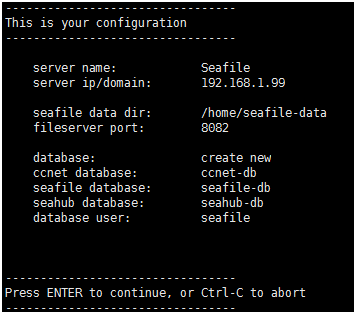
[root@centos-rpi3 seafile-server-6.2.5]# ./setup-seafile-mysql.sh
![]()
问题:在启动安装脚本时,报错提示找不到Python路径

在查看setup-seafile-mysql.sh后发现,安装脚本用到了which这个工具,而这个centos的系统默认没有自带which工具,安装which工具以后解决了。
安装过程可参考官方提供的管理手册
配置过程需要输入root@localhost用户访问的密码,同时会引到配置seafile建立的数据库的访问密码,这里两个密码我都设置成:lqvsb!076920
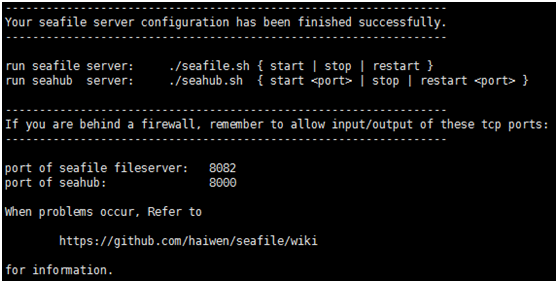
服务器端部署完毕
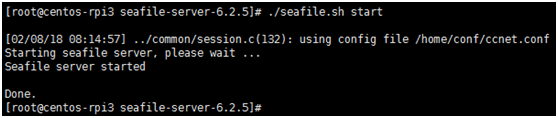
4.启动seafile服务
启动seafile服务
[root@centos-rpi3 seafile-server-6.2.5]# ./seahub.sh start
启动seahub服务
[root@centos-rpi3 seafile-server-6.2.5]# ./seahub.sh start
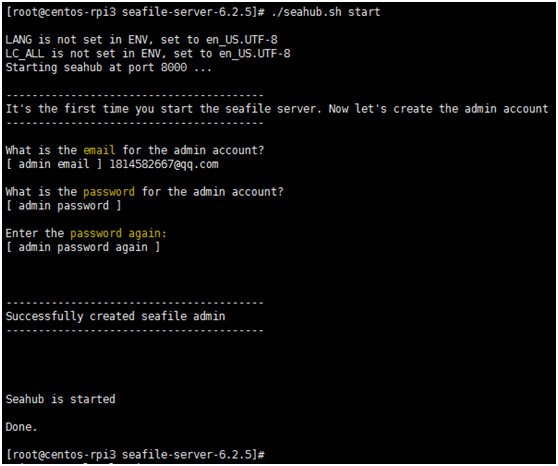
在第一次启动的时候,系统会提示你输入一个账号和密码,作为管理员账号和密码。
5、访问测试
服务器地址:http://192.168.80.9:8000
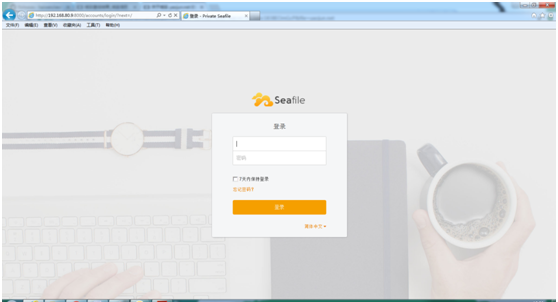
至此服务搭建完成,局域网可以使用了。后续有时间再整理下域名和局域网外访问的过程。